

ADVERTISEMENT
How To Detect Chronic Heel Pain With Musculoskeletal Ultrasound
Throughout the previous three decades, technological advances paved the way for the use of sonography in diagnosing and assessing musculoskeletal pathology. Continued innovations in this arena have led to affordable portable units that enable private office practitioners to utilize ultrasonography. Use of these units has grown over the last five years, especially in rheumatology. In fact, one leading ultrasound company has turned all of its advertising attention from the podiatry profession to rheumatology. However, podiatry still remains a formidable market for the portable ultrasound. There are many benefits to ultrasound. Its safety profile is excellent. Ultrasound produces no ionizing radiation as evidenced by its use in obstetrics. It has no known side effects or contraindications. It is inexpensive as compared to magnetic resonance imaging (MRI). There is minimal patient preparation and it is usually painless. It can be used for purposes such as guided injections, biopsies and draining of cysts. Ultrasound also allows for real time imaging, which is indispensable for assessing tendon integrity. However, ultrasound is also operator dependent and this becomes its leading limitation. In the educated hands, diagnostic ultrasound is a powerful tool. Being educated on this device involves more than knowing the anatomy and being able to recognize structures on the screen. Clinicians should also have a strong grasp of how the image is formed, the artifacts that can result and the variables that one controls while scanning. Accordingly, let us take a closer look at the technical aspects of ultrasound use.
Understanding The Physics Of Ultrasound
Sound waves travel through solids, liquids and air in sinusoidal waves. These waves really represent a mechanical disturbance (vibration) of the medium brought on by the acoustic energy. These vibrations are measured as cycles per second or hertz (Hz). Audible sound is in the range of 60 to 20,000 Hz. Anything above 20,000 is considered ultrasound. With musculoskeletal (MSK) diagnostic ultrasound, the vibrations are measured as MHz (1 million). Diagnostic ultrasound will fall in the range of 1.5 to 15 MHz while less than 3 MHz would be that used for therapy. The optimum range for MSK ultrasound is 7.5 to 13 MHz with 10 to 13 MHz being optimum for the foot and ankle. The higher the MHz, the less deep the sound waves will be able to readily penetrate. Conversely, the higher the frequency, the more detailed the image will be. It obviously makes sense to scan the foot and ankle at 10 to 13 MHz. In contrast, it is better to scan the leg at 7.5 to 10 MHz because it is a larger anatomic structure. Detail is highly dependent on the frequency of the probe. Also keep in mind that the size of the probe will affect detail. Smaller probes (i.e. less radius) will have fewer detail capabilities compared to a probe that has a larger radius. Other factors also contribute to the degree of detail but are beyond the scope of this article. The speed by which the sound wave will travel will change depending on the medium it propagates through. The average speed sound waves travel in human tissue is 1,540 m/sec. Sound waves will either travel through tissue and be attenuated or reflected. Those waves that return to the transducer (probe) will produce the signal on screen (white). When the sensor picks up no echoes, there will be no signal (black). When sound waves change speed, even minutely, the interface that exists between the tissues will appear as contrast to our eyes and be perceivable. For example, the surface of bone will be highly reflective and very bright (hyperechoic) while the rest of the bone deep to the surface will be not reflective (hypoechoic or anechoic) because the sound waves did not penetrate the surface. This is considered acoustic shadowing. The fibers that make up tendon and fascia will be hyperechoic contrasted by hypoechoic areas. Also, detail is optimum when the sound wave is perpendicular to the structure that one is scanning. When the wave is angled, one will have a decrease in returning echoes.
A Guide To Possible Artifacts
Artifacts that present on ultrasound can confuse the sonographer and lead to misrepresentations of the image. They can occur for many reasons including: ultrasound physics, operator error, equipment error and unfamiliar use of the equipment variables. Clinicians need to be cognizant of these artifacts if proper ultrasound interpretation is going to occur. In fact, some of these artifacts are beneficial for the clinician. Accordingly, let us discuss some of the more common artifacts one may encounter when obtaining ultrasound views of the foot and ankle. Anisotropy is the most common and well-known artifact in musculoskeletal ultrasound. It is the result of the sound wave striking the anatomical structure at an angle of less than 90 degrees (perpendicular). As mentioned earlier in this article, when the acoustic wave hits an anatomic structure in less than a perpendicular fashion, there will be fewer returning echoes and one will see a hypoechoic signal (dark). This sound wave phenomenon occurs at tendon and fascia attachment to bone, ligaments and nerve. It is most common in tendon and fascia. However, be aware that it is easy to mistake this for pathology (i.e. inflammation). One can easily collect for this artifact by rocking the probe (heel to toe). If the hypoechoic signal is eliminated, you know this is an artifact. Refractile shadowing (critical angle, edge shadowing) is an artifact that occurs around curved surfaces. The edge of the curved surface will deflect the acoustic wave and there will be a lack of echoes returning to the probe. Accordingly, one will notice a hypoechoic (black) signal. This will be enhanced when increased fluid surrounds the structure as in the case of tendonitis. The intervening tissue that the sound wave travels through can affect the quality of the wave before it encounters the area in question. This intervening tissue can attenuate the signal or enhance the signal. A fluid-filled cyst will allow the sound waves to be less attenuated and the tissue deep to the cyst will appear hyperechoic (bright) on the screen. This is referred to as acoustic enhancement and can help us determine if the cyst is indeed filled with fluid. Conversely, if the cyst has more consistency such as calcification, one will see acoustic shadowing (hypoechoic) deep to the cyst. Comet tail artifact occurs when we insonate over glass or metallic objects. Reoccurring echogenic bands will look like the tail of a comet. This can come into play when utilizing ultrasound on foreign bodies or screw fixation. Other artifacts can present when using ultrasound but those we have briefly described above are the most common.
How Does The Ultrasound Machine Work?
The transducer or probe has a dual function. As the transmitter produces electrical energy, this energy is sent to the transducer. This signal changes the shape of the piezoelectric crystals housed in the transducer. These crystals produce a mechanical energy (sound waves) that subsequently emits into the body. This same probe also takes the returning echoes and converts them back to electrical energy, which will then form the image on screen. It should come as no surprise that this probe is usually at least one-fifth the price of the whole unit. As mentioned above, the probe size will affect the quality of the sound wave. A smaller probe can lessen the detail of the image. This is obviously important when dealing with small anatomic structures in the foot. The acoustic window is simply the amount of tissue that one can scan at one time. It directly correlates to the size of the probe. Some clinicians utilize a standoff pad with the probe. A standoff pad is a flexible attachment that one can fasten to the end of the probe. This converts an inflexible stiff probe into a flexible one. This will allow the probe to conform around curved surfaces (i.e. malleoli). Also, probing near field tissue can produce reverberations (static) that hinder imaging. Utilization of the pad can help reduce this. One sees this static more in lower frequency probes and thus the higher quality ultrasound does not need these pads as much. Cutaneous imaging may improve with utilization of a standoff pad. The sound waves that travel deeper will be more attenuated than those that encounter superficial tissue. Tissue gain compensation (TGC) is a control that can increase the intensity of those attenuated waves. This feature can be automated in the newer units. The gain is a control that either increases or decreases the intensity of the returning echoes. It is a control that is frequently employed while imaging. Higher quality units will also have a separate contrast control.
What Two Case Studies Reveal About Imaging Of The Heel
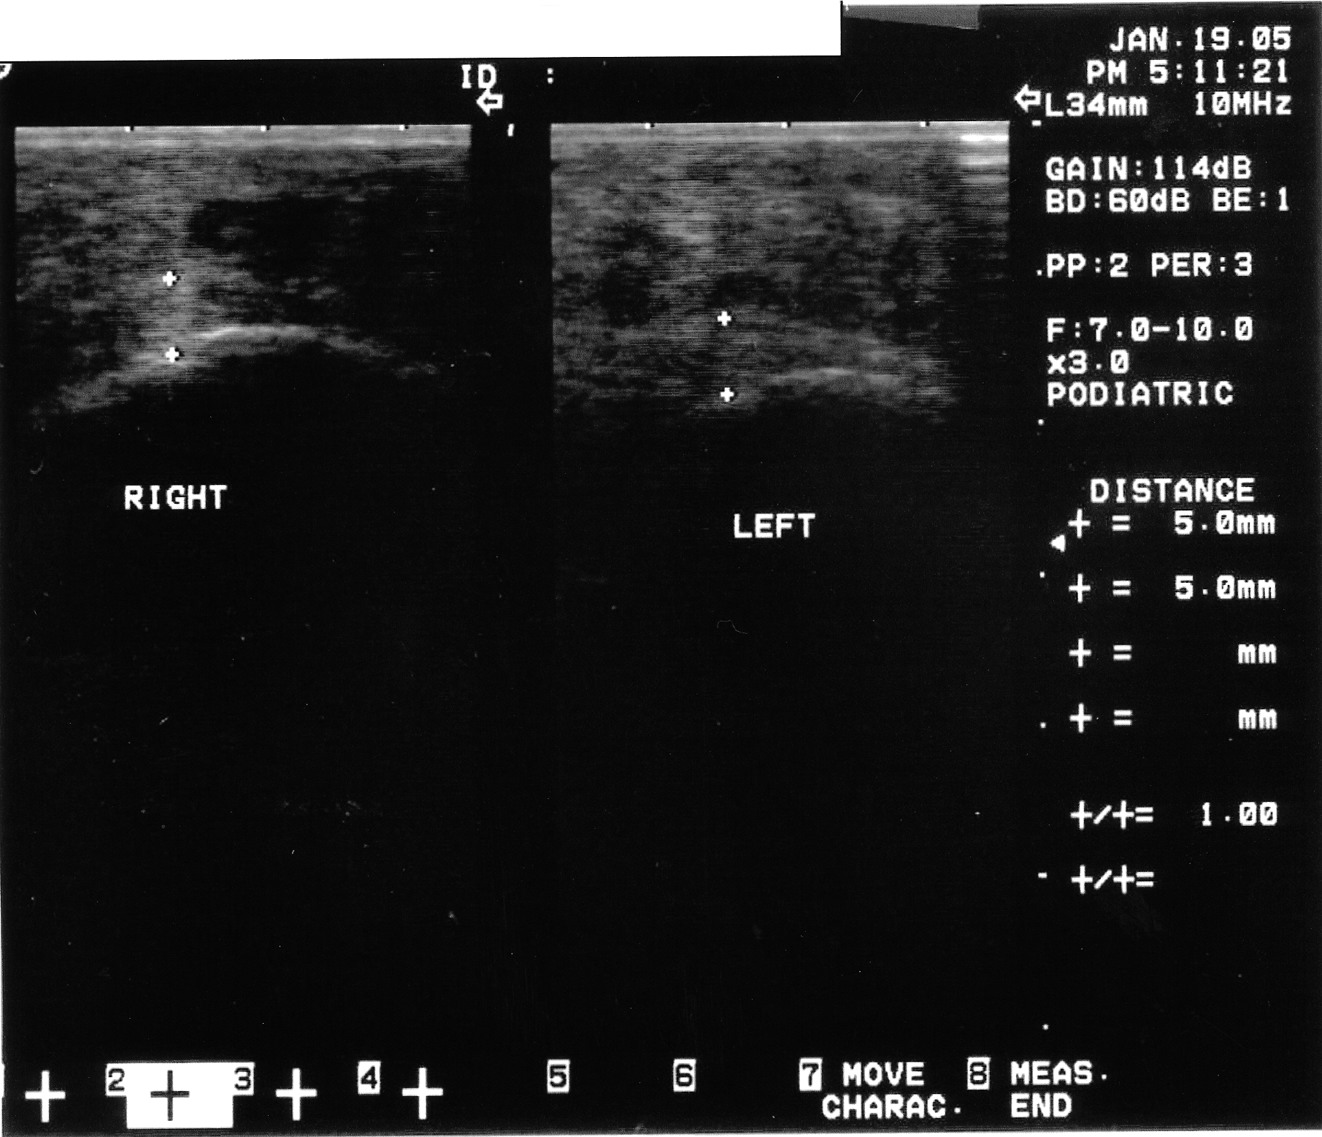
Podiatrists are the experts in dealing with pathology of the heel. It remains one of the leading pathologies that we see clinically. It is also an anatomic area that is easy to ultrasound. While it has been one of the first areas that clinicians new to ultrasound use the device for, I believe this modality is underutilized overall. Granted, podiatrists can diagnose plantar fasciosis clinically with a high degree of accuracy without the aid of ultrasound. However, there are other causes of heel pain that can mimic plantar fasciosis. These possible causes include tarsal tunnel, nerve entrapment, sciatica, soft tissue masses, calcaneal stress fractures and systemic causes. Recently, I had two cases that illustrate this. Case study one. A 52-year-old female presented with heel pain of three months’ duration. The pain was at the inferior aspect of the heel at the medial tuberosity. She noted the pain was worse in the morning and after any period of rest. She had one steroid injection several weeks prior by a podiatrist and was 30 percent better. The clinical exam revealed pain with palpation at the medial tuberosity and central inferior aspect of the calcaneus. The rest of the exam was unremarkable. Radiographs were unremarkable. However, musculoskeletal ultrasound imaging showed indeed that the fascia was thickened but also revealed a well-formed cyst at the inferior aspect of the heel. This was not discernible clinically. Case study two. A 48-year-old male patient presented with a two-year history of plantar fasciosis. Past treatment included seven steroid injections, nonsteroidal antiinflammatories, physical therapy, a night brace, orthoses and two surgical procedures. The improvement was minimal. Subsequent imaging via musculoskeletal ultrasound showed a normal fascia as compared to the asymptomatic contralateral heel. A subsequent assessment revealed the patient had multiple nerve compression.
Key Pearls For Obtaining Optimal Heel Scans
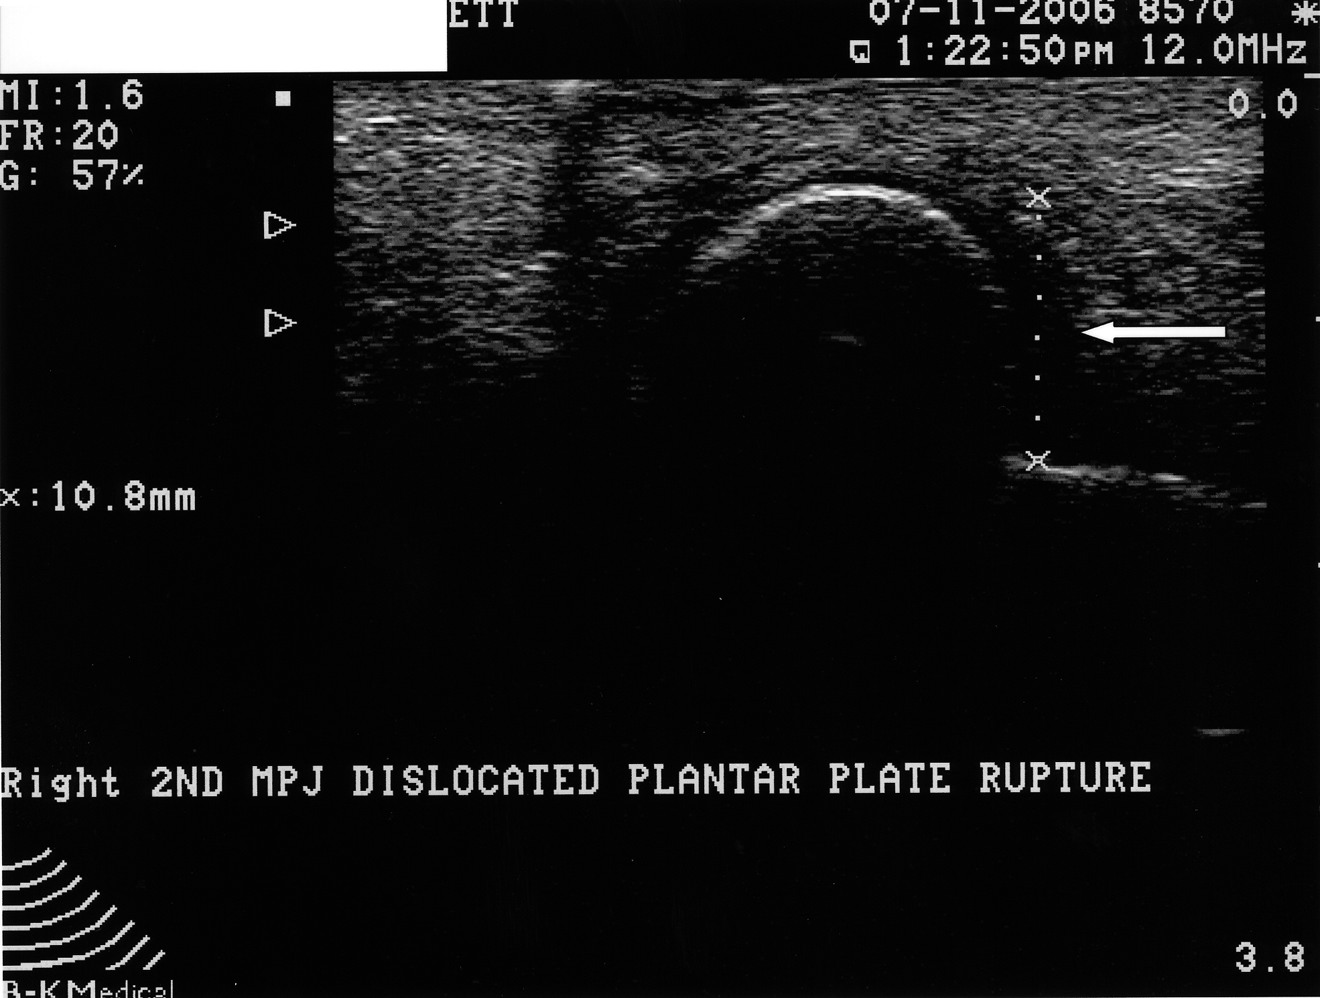
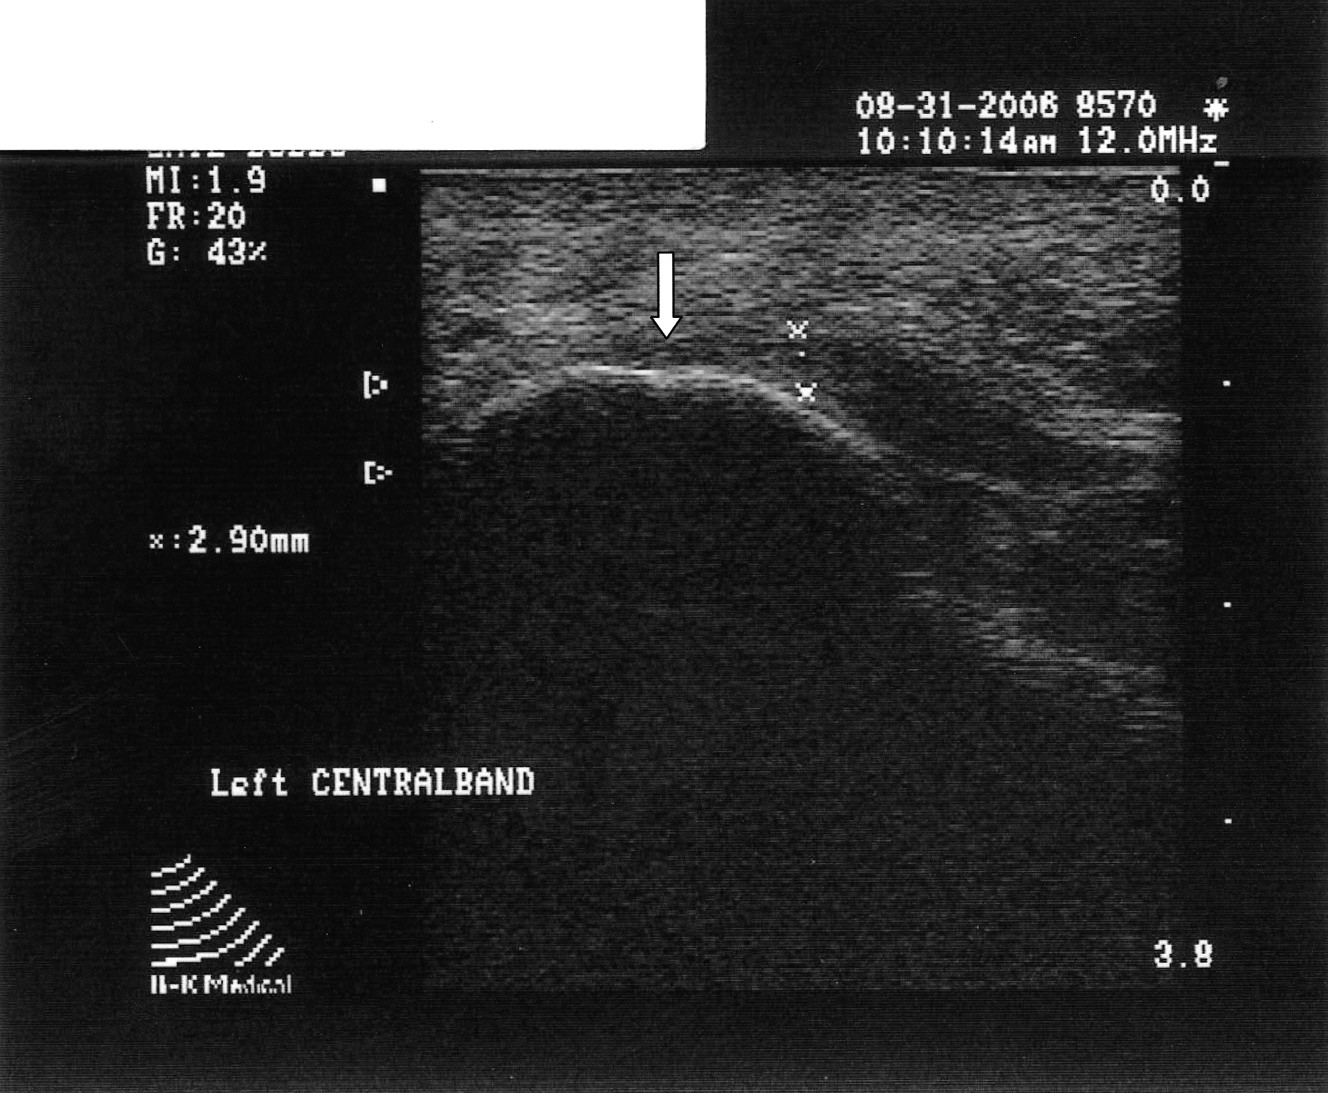
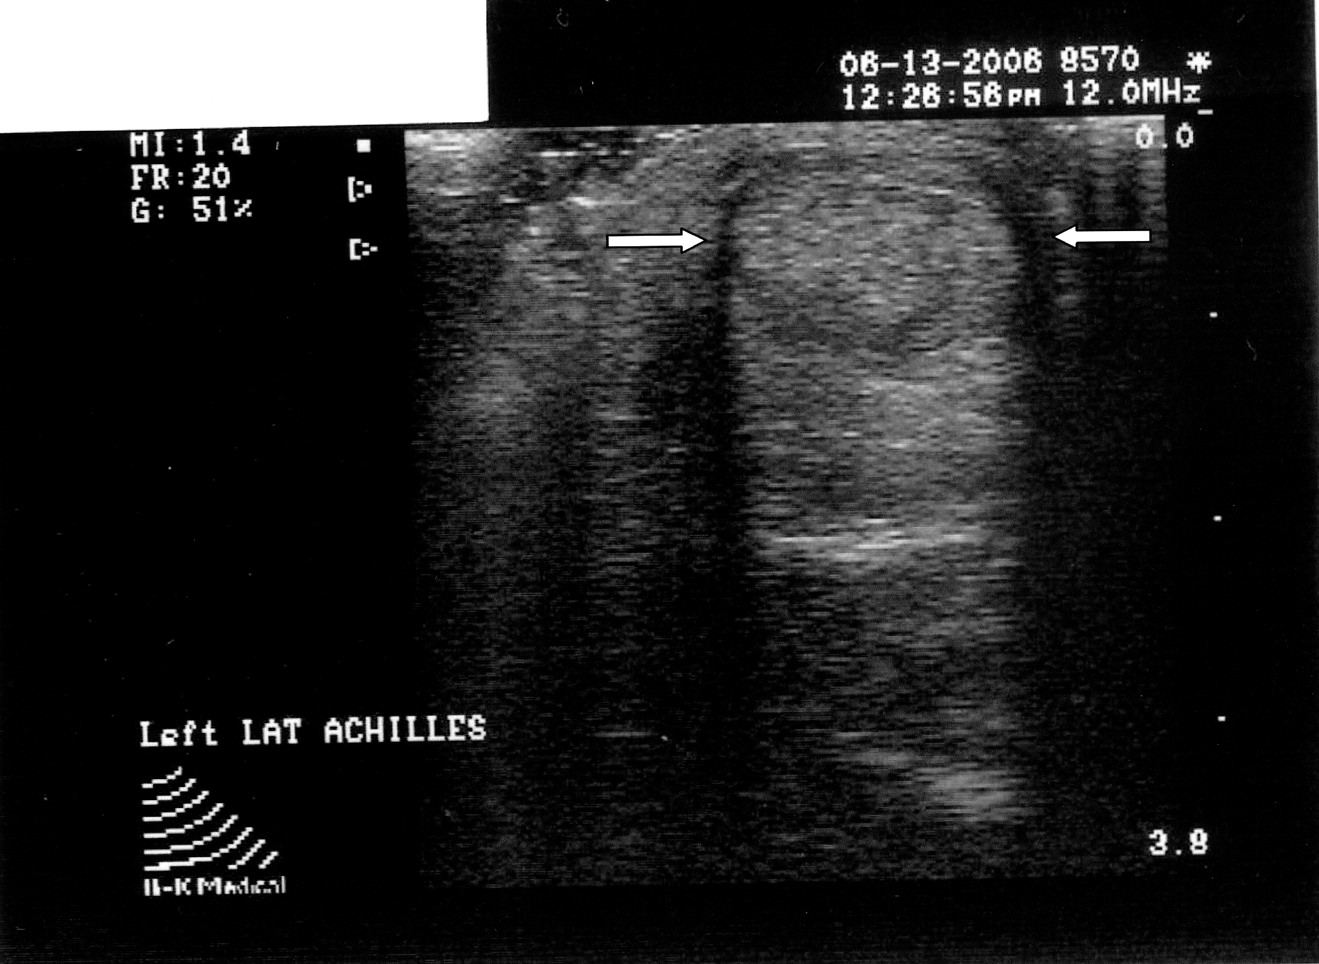
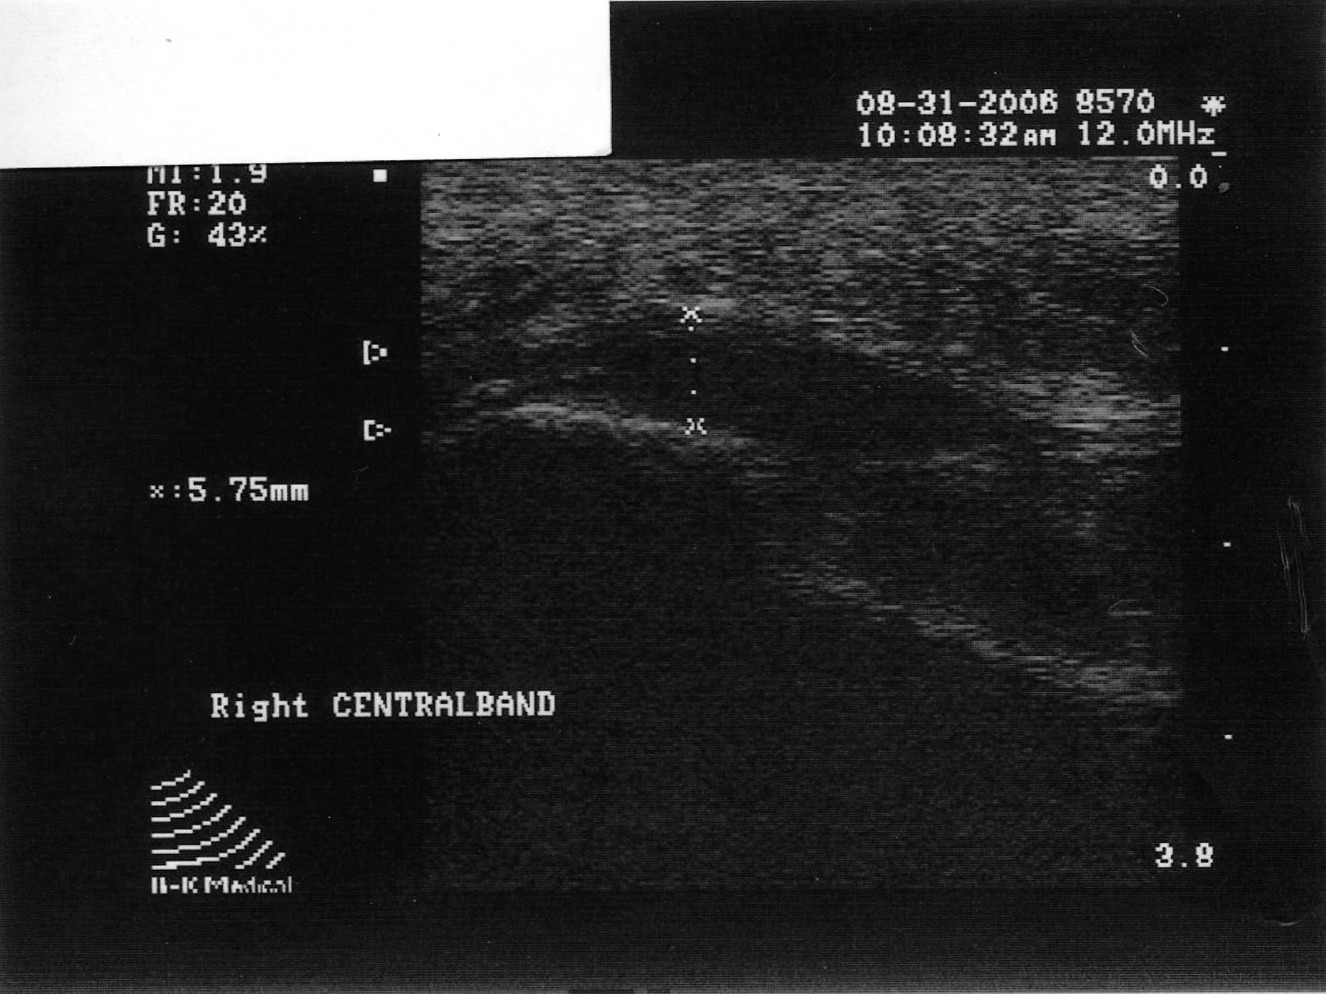
By utilizing musculoskeletal ultrasound imaging, the clinician can avoid frustration by identifying these esoteric etiologies earlier. One can also assess the severity of the problem. Indeed, clinicians can obtain quantitative measurements of the fascia and make (and document) qualitative assessments. Podiatrists can develop protocols and tailor treatment according to the severity of the condition. The more accurate assessment can help determine the success or lack thereof of the treatment plan that clinicians employ. One can scan the heel with the patient supine or prone. The preferred method is to have the patient in the prone position. Most clinicians lean toward this position because it tends to be easier for the examiner. Assess all three bands: medial, central and lateral. The examiner can scan in the long axis (sagittal plane) and the short axis (coronal plane). By far, the long axis will give the best information on the status of the fascia. One should assess the quality of the fascia. A normal fascia will have a fibrillar pattern. There will be anisotropy present where the fibers attach to the inferior aspect of the calcaneus. Take care not to confuse this with pathology. When documenting this properly, it is important to include a photo with the written description. Assessment then proceeds with measurement of the plantar fascia. Measure at the inferior aspect of the heel. Place the digital calipers at the hyperechoic line that represents the inferior aspect of the heel and the hyperechoic outline of the fascia at its most plantar expansion. (Just to clarify, the superior aspect of the image on the screen represents the plantar aspect of the heel. In other words, the image is inverted. By U.S. convention, the right of the screen should represent distal and the left of the screen would be proximal. Turning the probe 180 degrees will correct the orientation if one finds this not to be the case.) A fascial thickness of 4 mm has been mentioned as the upper limit of normal. When it comes to fascial thickness, I have even heard that one should consider upper normal limits of 4 mm for the medial band, 3 mm for the central band and 2 mm for the lateral band. Barrett, et. al., have looked at cadavers and plantar fascial thickness.1 It stands to reason that fascial thickness will vary depending on the size of the individual. I have seen this in my own practice. I have measured a patient’s normal fascia at 5 mm in thickness numerous times. Accordingly, when it comes to a unilateral case, one must compare the affected heel to the contralateral side. Another pitfall to avoid is including the deep musculature (i.e. flexor digitorum brevis) in one’s measurement. In some individuals, the muscular layer can be delineated deep to the fascia at the heel. Documentation of an ultrasound of the heel can be in a separate report or as a subset of the objective part of one’s notes. Either way, photos should accompany the written report. The assessment should include the measurements of all three bands of the symptomatic fascia and, in a unilateral case, the asymptomatic heel as a comparison. Along with the quantitative assessment, one should include a qualitative description as well and utilize proper terminology. Here are some of the more common terms: • Hyperechoic: increased echo or brightness on the screen • Hypoechoic: decreased echo or gray to dark on the screen • Anechoic: lack of echo or black on the screen • Fibrillar pattern: normal fiber pattern of tendon or ligament • Echotexture: general term referring to the internal architecture of the structure and the echo pattern seen
In Summary
Musculoskeletal ultrasound is a powerful diagnostic tool. In a relatively short clinical time, one can obtain vital information to better diagnose and subsequently treat patients. What is paramount, however, is the need for proper education and training in its use. In addition to understanding the anatomy, one must also understand the physics, the artifacts inherent with imaging and the machine itself. As we have seen, musculoskeletal ultrasound provides strong identification of the fascia but can also enable the clinician to assess soft tissue masses, tendinopathy and ligament injuries just as well. One may also utilize the ultrasound for guided injections and directed biopsies. Dr. Tassone is an Assistant Professor and Course Director for Medical Imaging at the Arizona Podiatric Medical Program at Midwestern University. He is a Diplomate of the American Board of Podiatric Orthopedics and Primary Podiatric Medicine, and a Diplomate of the American Board of Multiple Specialties in Podiatry. Dr. Tassone has a private practice in Glendale, Ariz.
References:
1. Barrett SL, Day SV, Pignetti TT, Egly BR. Endoscopic heel anatomy: analysis of 200 fresh frozen specimens. J Foot Ankle Surg 1995 Jan-Feb; 34(1):51-56.
Additional References
2. Wong SM, Griffeth J, Tang A, Hui A. The role of Ultrasonography in the Diagnoses and Management of Idiopathic Plantar Fasciitis, Rheumatology 2002: 41: 835-836.
3. Sabir N, Demirlenk S, Cubkeu S, Yagci B. Clinical Utility of Sonography in Diagnosing Plantar Fasciitis, J Ultrasound Med 1998: 24: 1041-1048.
4. Muglia V, Cooperberg P. “Artifacts,” www.rad.pulmonary.ubc.ca/USartifacts.
5. Dondelinger RF, Marcelis S, Daenen B, Ferrara M. Peripheral Musculoskeletal Ultrasound Atlas, New York, Thieme Medical Publishers: 1996. 6. Zagzebiski J. Essentials of Ultrasound Physics, St. Louis, Missouri, Mosby: 1996.


